A year or two ago, I had my washing machine stop working and I called someone out, only to have them tell me it wouldn’t be worth it to fix it. I had to pay a $60 or so trip charge, then another bunch of money for a new machine. So, when my girlfriend Kristian told me her washing machine wasn’t working, it seemed like a waste of time to even have someone come out and take a look. We entered the symptoms into google, though, and found a possible fix that was pretty cheap if you do it yourself.
The washer was making grinding noises and wouldn’t spin or agitate, so apparently that is common if you have a broken “motor coupling”. This guide I found online was very helpful. With that in hand, I decided to tear the thing apart. In the worst case, it would have to be replaced, so it was worth a shot. Plus, it would be fun to take it apart.
Apparently, most top loading washers are pretty similar in design. Hers is an Estate TAWX700JQ2. Estate is a cheaper line that is made by Whirlpool. Looking through the guide, I found that the first step is always to loosen the control panel and flip it back. There are a few different ways to open the control panel, but none of them seemed to work. Finally, I found a guide that mentioned removing screws on the back of the machine. I took out four screws per the instructions and everything came loose. It turns out, you only need to remove two, otherwise you’re removing the whole panel from the little hinge things that are supposed to support it. Here’s a picture with the screw that needs to be removed pointed out. It’s kind of at odd angle, facing upwards, but that makes it easy to remove without even pulling the washer out of its spot. There are two of these screws, one on each side.
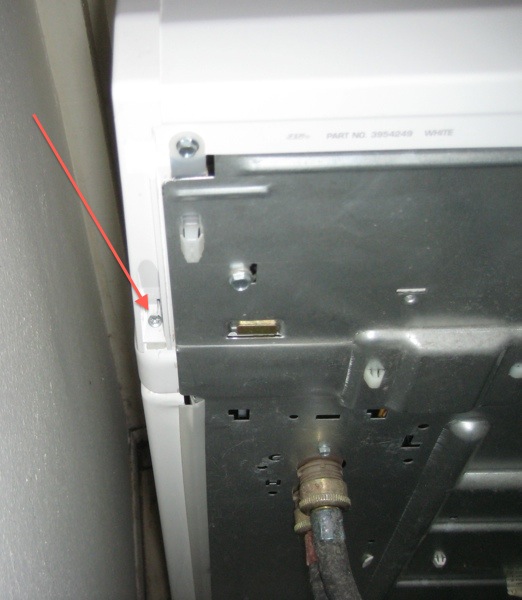
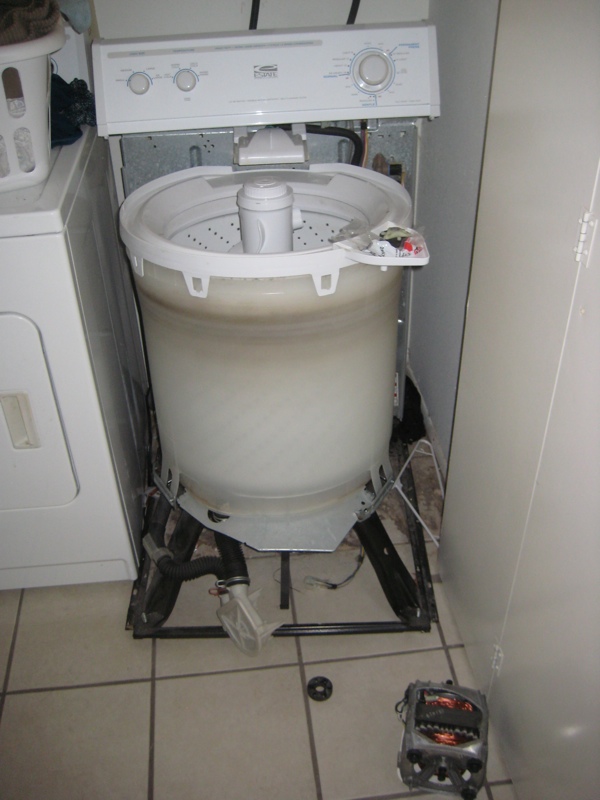
Once you have the control panel loose, you need to disconnect a wiring harness that plugs into the lower part of the cabinet, then pop out two clips, which appear to be exactly the same as in the guide I linked earlier. Once that is done, you can pull the cabinet off easily. At this point, you can see the whole guts of the machine, and it’s pretty exciting.
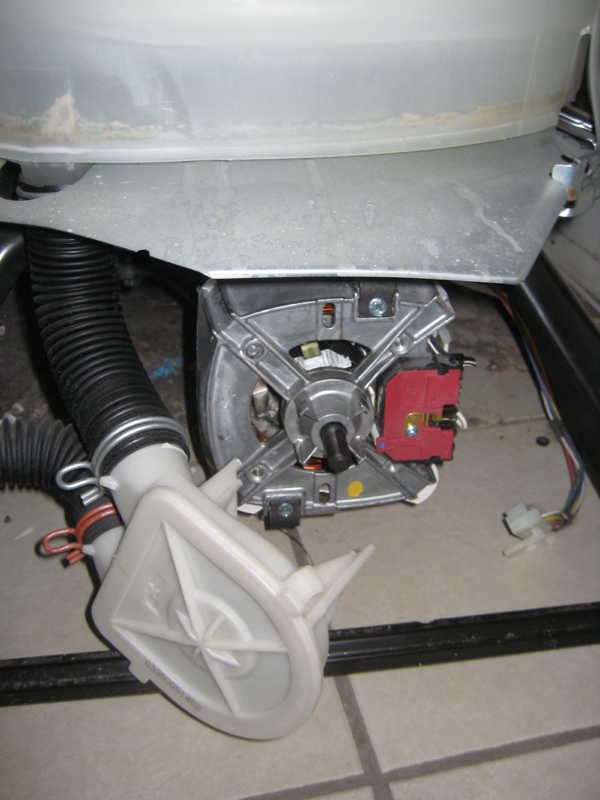
Next, you need to get access to the motor coupling, which is a little plastic part that connects the motor to the transmission. The transmission is what drives the spinning of the drum and the agitation. To get at the coupling, you need to remove the pump, which is attached the front of the motor with some clips. This is really easy to remove. Here’s the pump removed, with the motor exposed (the pump is the white thing with hoses attached):
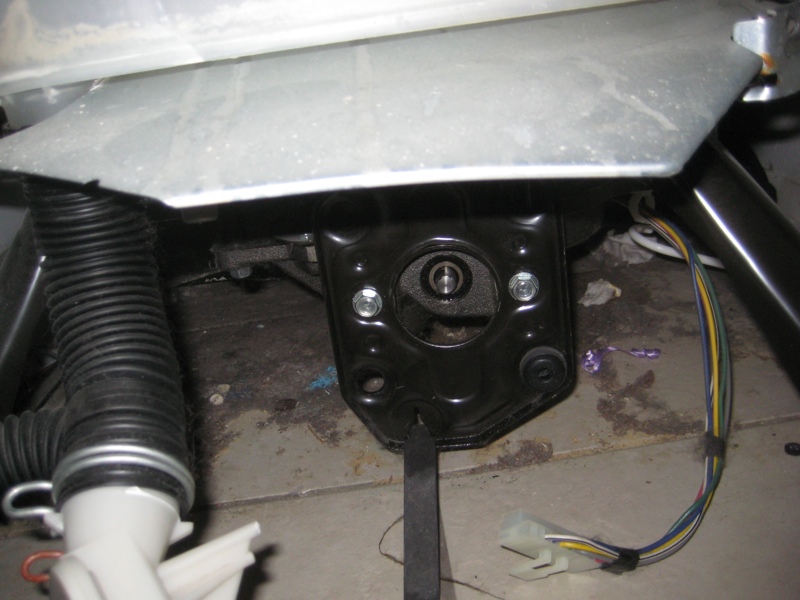
Next, you unplug the wiring harness from the motor (there was only one on this model, contrary to the instructions). You remove some screws from the motor, pop off some clips, and it pops right out. When you remove the motor, you want to be careful because it’s pretty heavy. I put a bunched up towel under it, so it wouldn’t bang up the floor, but getting the clips off required some screwdriver prying, so I remove the towel for better access, and then ended up dropping it on the floor. Oops. With the motor removed, you end up with something looking like this.
 Here’s a picture of the transmission, where the motor was attached. In this picture, the coupling is removed, so you can just see the shaft.
From what I’ve seen online, the motor coupling can fail in various ways, but as soon as I pulled out the motor, this one popped out and you could see it was just cracked in half. There are three parts to the coupling, and just the part connected to the motor was broken. I’ve seen stuff where it’s a lot worse.

At this point, I had to stop and get the new part, but I think it probably took less than an hour to get everything taken apart.
The next day, I picked up a part from this place, which had a location in Tempe. It was $14.99+tax, and I didn’t need to give them a model number or anything. Apparently this part is common to all direct drive washers.
As I mentioned before, there are three parts to the coupling. The next day, we removed the rubber ring, and the part that attaches to the transmission (we needed to use a pliers to pull it off), then put all the new parts in. The new parts didn’t mount on the shafts of the transmission or motor very easily, so we had to use a rubber mallet combined with a wooden dowel to pound them in. After the new parts were mounted, it is slightly tricky to line everything up when you put the motor back in, but otherwise everything went very smoothly. After everything was back together, the washer worked again! Hooray!
After this experience, I think the mystery of fixing a washing machine went away, and I wouldn’t be hesitant to attempt more complicated repairs. It’s pretty easy to take apart, and the internals seem pretty simple. Another funny thing to mention is that this was all done without removing or turn off the water supply. I wouldn’t recommend doing it that way, but in this case, the shutoff valves were not working, and it would’ve taken much longer if we had to replace those first.
To recap, here’s what you have to do:
- Remove two screws from the back of the control panel
- Flip control panel back
- Remove wiring harness
- Pop out two clips holding cabinet
- Lift off cabinet
- Remove clips holding pump, and pull pump to the side
- Remove wiring harness and screws from motor
- Remove motor clips and pull out motor
- Remove coupling parts
- Put new coupling parts in place
- Line up couplings and put motor in place
- Replace motor clips
- Screw in motor clips and attach wiring harness
- Replace pump and its clips
- Put cabinet back on
- Put cabinet clips back in (just push down to snap them in)
- Attach wiring harness from panel
- Flip panel down and replace screws
